How to Upload an XML Parts List to BrickLink
How to Upload an XML Parts List to BrickLink and Buy Your Parts
A step-by-step guide to uploading a BrickLink XML parts list, creating a Wanted List, and buying everything you need in one go.
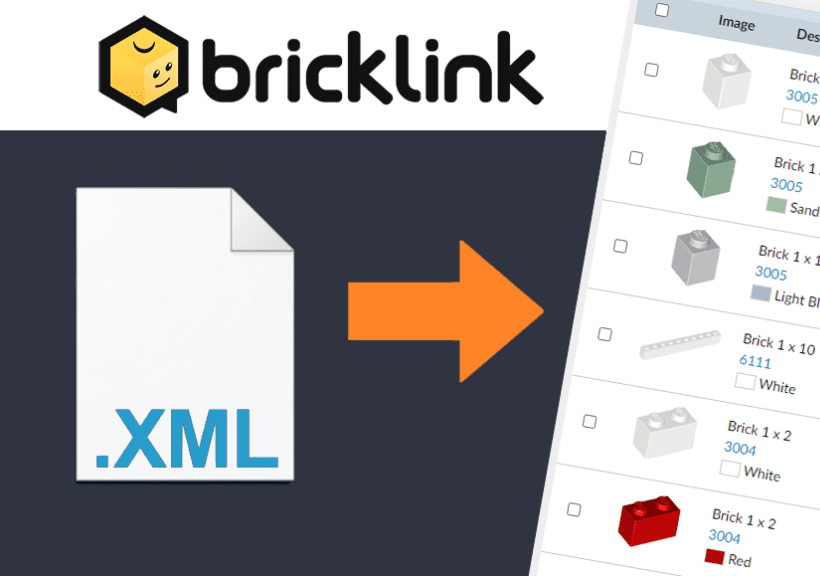
Each build on this site comes with a downloadable BrickLink XML parts list. This file contains every part you need, in the correct color and quantity. Upload it to BrickLink and you can source all the parts from sellers around the world — often for a few dollars total on smaller builds.
If you have never used BrickLink before, this guide will walk you through the entire process from start to finish. If you are an experienced BrickLink user, note that the interface has changed — the Wanted List upload is no longer under a heart icon in the top navigation bar. It is now found under your profile menu.
Step 1 — Log In to Your BrickLink Account
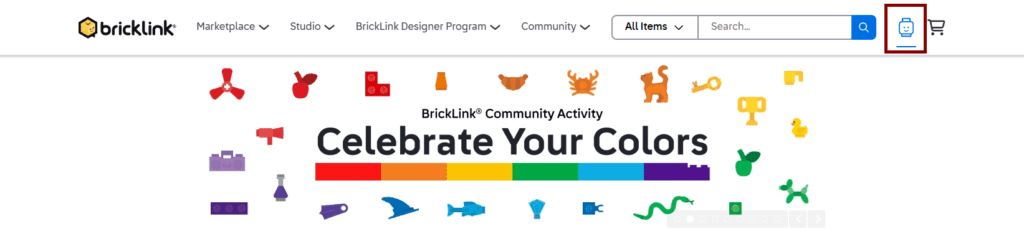
Go to bricklink.com and log in to your account. If you don’t already have a BrickLink account, register for a free account. You need an account to create a Wanted List and purchase parts.
Step 2 — Open the XML File in a Text Editor
Download the XML parts list file from the build article. Before going to BrickLink, open the file in a plain text editor:
- Windows — right-click the file and select Open with > Notepad
- Mac — right-click the file and select Open with > TextEdit. If TextEdit opens in rich text mode, go to Format > Make Plain Text first.
Once the file is open, select all the text (Ctrl+A on Windows, Cmd+A on Mac) and copy it (Ctrl+C on Windows, Cmd+C on Mac). You should see XML code that looks like this:
Step 3 — Navigate to the Wanted List Upload Page
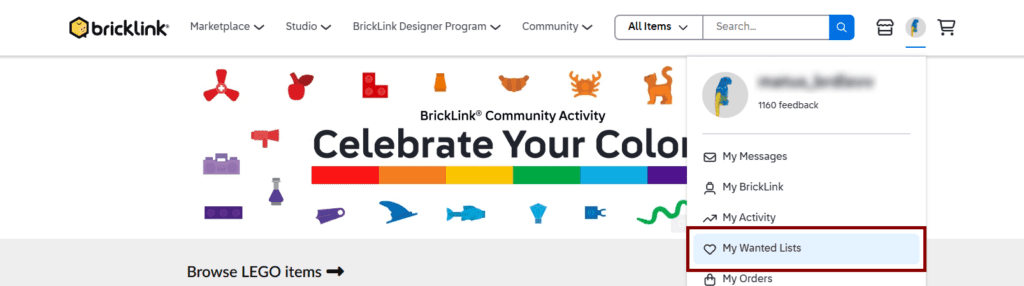
Click on your profile icon or username in the top right corner of the page. In the dropdown menu, look for My Wanted Lists — it has a heart icon next to it. Click it.
Step 4 — Perform the XML Upload
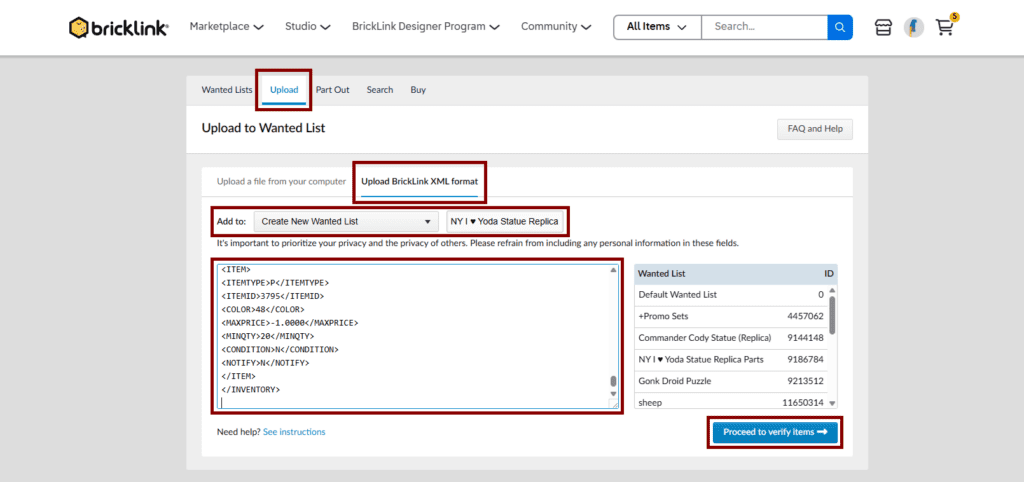
On the Wanted Lists page, click on the Upload tab and then click on the Upload BrickLink XML Format option.
In the form below, select Create New Wanted List from the Add to drop down list and give it a name — something like “NY I ♥ Yoda Statue” works well.
Click inside the text box and paste the XML code you copied in Step 2 (Ctrl+V on Windows, Cmd+V on Mac). Make sure there are no extra spaces or characters before the opening <?xml tag — the upload will fail if the text box is not clean.
Click Proceed to verify items.
Step 5 — Verify the Parts List
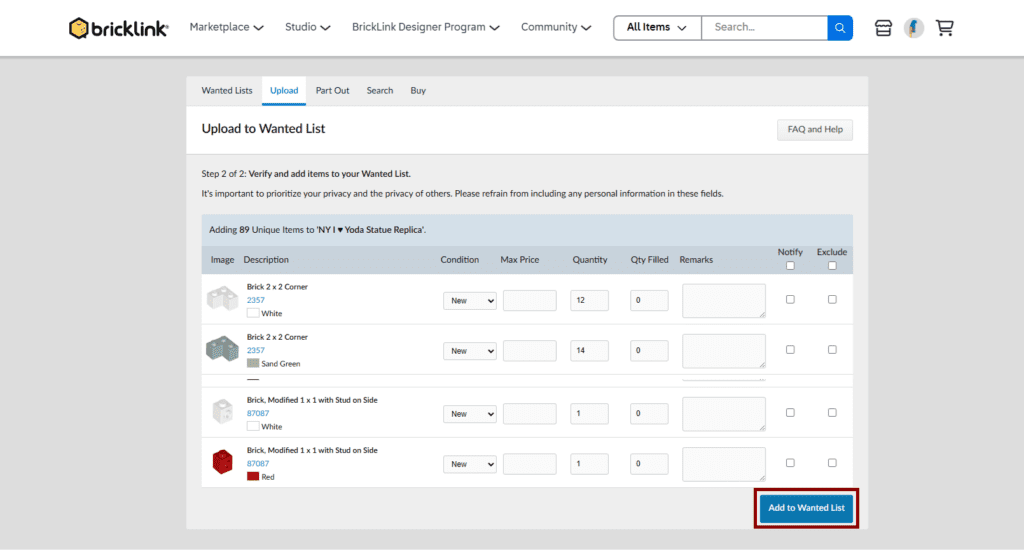
BrickLink will show you a list of every part in the XML file with its color, quantity, and availability. Review the list to make sure everything looks correct.
If you already own some of the parts, find them in the list and either check the Exclude box or adjust the Qty Filled number to reflect what you have. This prevents you from ordering parts you don’t need. Please note, you can also edit the quantities in the wanted list later, if you don’t want to update the quantities now.
When you are satisfied, scroll to the bottom and click Add to Wanted List. You should see a confirmation message that the items were successfully added.
Step 6 — Buy Your Parts
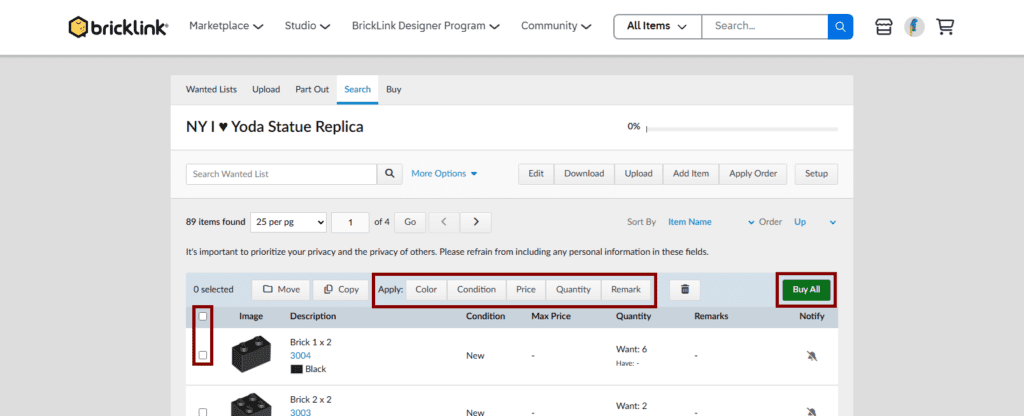
Go to your Wanted List. You will see all the parts listed with their availability across BrickLink stores. In the wanted list, you can select all or specific parts using the checkboxes on the left and then adjust the Color, Condition, Quantity, and other attributes using the options in the Apply header.
When ready to proceed, click Buy All in the top right corner.
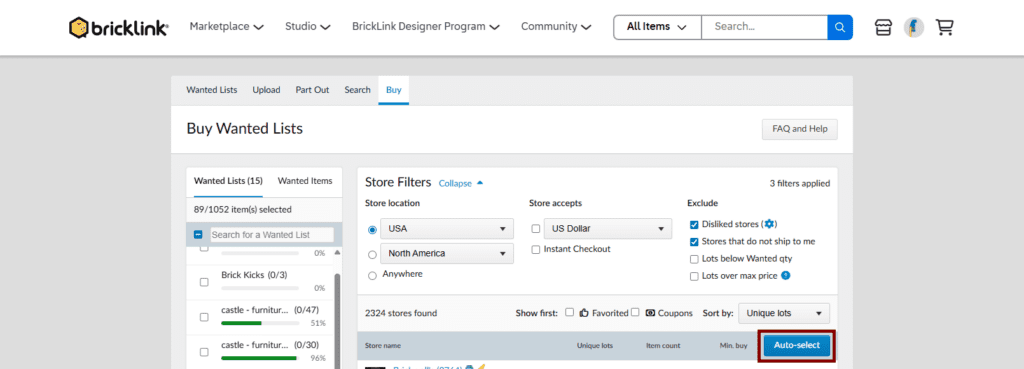
On the Buy Wanted Lists page, set store filters using the parameters provided and then click Auto-select.
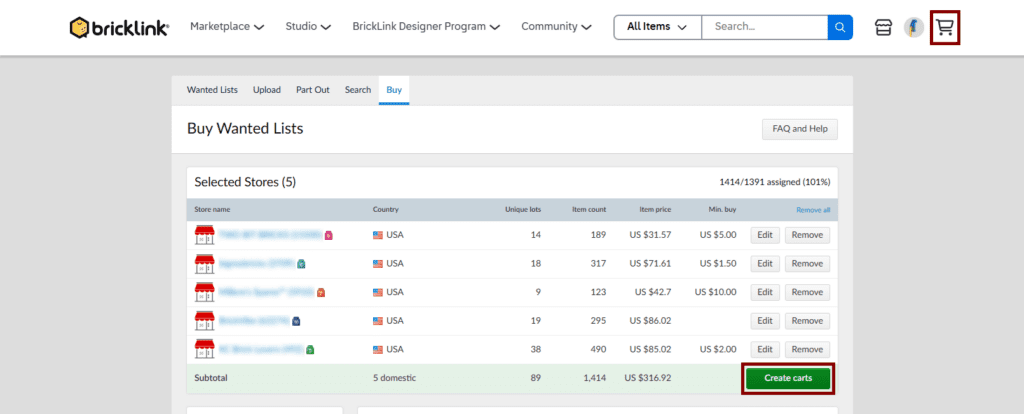
BrickLink will analyze all available stores and suggest the most efficient combination of stores to buy from to get all your parts — minimizing the number of orders while keeping shipping costs low. You can accept the suggested stores or adjust the selection manually.
When ready, click Create carts. BrickLink will create a shopping cart for each store. Each store has its own process to check out. Be sure to review the store’s terms, shipping costs, minimum order requirements, and accepted payment methods before checking out.
Place your orders and wait for your parts to arrive.
Tips for New BrickLink Buyers
- Check store minimums — many stores have a minimum order value. If a store only has a few of your parts, it may be cheaper to find them elsewhere than to pad the order to meet the minimum.
- Check shipping costs — a store with cheaper parts but expensive shipping may cost more overall than a slightly pricier store with flat-rate shipping.
- Check seller feedback — BrickLink has a feedback system similar to eBay. Stick to sellers with high positive feedback ratings, especially for your first few orders.
- Buy new or used — our XML files default to new (N) condition. You can change individual parts to used (U) in the Wanted List if you want to reduce costs. For display builds, new parts are recommended.
- Color accuracy matters — the XML files on this site specify exact BrickLink color codes. Do not substitute colors, especially on parts like dark green versus olive green, or dark gray versus dark bluish gray — these are visually distinct and will affect the accuracy of your build.
Last updated: May 2026. BrickLink’s interface changes periodically — if the steps above don’t match what you see, please leave a comment and we will update the guide.